Since moving my music "to the cloud" in Apple Music and running short of storage space on my iPad with all my Synth software, I find that I don't have nearly as much music to listen to on long flights. When I want to zone out or relax on cross-country flights, I like to have some ambient or low-key music to keep in the background while I'm semi-conscious. Without sufficient studio time to craft lots of harmonies and voices, its software to the rescue. I used generative music apps to create evolving melodies for each leg of the trip.
I put together a baroque repeating piece on my way to LA which came out as the following:
I used the very interesting Fugue Machine to put together a sequence of notes played on the Rucker Harpsichord app in 2-3 separate voices in differing tempos. Periodically, I'd use the software to invert, mute and/or mangle each of the voices. While the result is a bit "busy", I think it came out ok. Nice when kept on repeat.
On the way home I went to some old favorites using Noatikl, the Korg iM1 and MultiTrack DAW. For the return, I programmed a pad voice, a bass and a lead all using separate MIDI channels in the iM1. This one did have the desired zoning effect and kept the background noise (lots of that in economy seating) at bay.
Saturday, October 17, 2015
Saturday, April 4, 2015
Cheaper Music Making - Part 6 Geeks only need apply

When I last posted on the Linux music making effort, I was wrestling with Crouton, latency and several Linux based DAWs. Its been awhile and I've done quite a bit of experimenting and hacking since then. With all of this effort, I'm drawing a few conclusions that I'd like to share:
- While cheap in terms of hardware, making music on Linux is significantly more difficult than on a commercial platform. The setup for hardware and software solutions are overwhelming and in varying degrees of maturity - it remains a domain for tinkerers and hackers.
- Crouton, while tremendous on the Chromebook has a "wall" when it comes to latency. Since it shares its kernel with the chroots and its kernel is not optimized for low latency (such as hooking up MIDI keyboards), there is only so far it can take you. I find it usable, but just barely.
- It is a lot of fun hacking around getting all of this to work - which is why I kept going on this over the past month. My definition of "fun" might not fit yours though!
- If you are really just looking for cheap hardware for your music making, you might do better to focus on second hand hardware and use cheap and/or free options. Many of the software packages for music making on Linux have cross-platform options.
With all that said, I decided to try yet another option on the chromebook hardware - a full linux distribution that dual boots along with Chrome OS. By going with a full distro, I can tweak the settings and kernel as needed to get the desired performance (in theory at least). I already replaced the SSD in the chromebook with a 128GB option, so I decided to install an independent 32GB Linux partition.
Any kind of hardware configuration in Linux requires a detailed knowledge of the touchpad, music cards, screens, etc. Instead of going through all of that work, I did take a shortcut and used pre-configured Linux installs for my Acer C720 available at Distroshare. This site has many Linux options pre-made for a few Acer chromebooks - the C720 and C740 for the most part.
If you wish to go this route and create a dual-booting Linux, I cannot emphasize enough the need for backups! Chrome OS is very easy to recover, but if you have files on your local machine in your Downloads folder or you have existing crouton setups, you need to back these up before trying to partition and install a full distro. The instructions on Distroshare, sort of assume you are setting up Linux for the first time and don't make it clear that the process is destructive! It will cause your Chromebook to reset itself. Also, many installers are looking to completely replace Chrome OS. In my case I wanted to be able to boot either OS so you have to look for the instructions for Dual-boot and follow them carefully. If you make a mistake (I made several!), be prepared to do a full recovery of your Chrome OS - not that hard, but takes about 20 minutes or so each time. I've slightly altered the instructions from the site. Please note that step 1 will cause the partition to be created and your chromebook will recover itself - so have your backups first!
- Go into a terminal window on your Chromebook (Ctrl-Alt-T), type shell and download and run the Chrubuntu script to partition the disk: curl -L -O http://goo.gl/s9ryd; sudo bash s9ryd. At this point, Chrome will reboot and repair itself. Format the filesystem on /dev/sda7 while you are in the ChromeOS shell, which is where Linux is going to. To do that, type sudo mkfs.ext4 /dev/sda7
- Reboot and boot into legacy mode (Ctl-L) with the usb stick with this distro on it.
- Run the installer continue on until you reach the "Installation Type" section.
- Choose: "Something else" or "manual install"
- Select /dev/sda7
- Select Change.
- In the popup window, configure it so the filesystem matches what you formated it as in step #3 and the mount point is "/". Do NOT select the format checkbox. Then press ok.
- A new popup might show up with the title: "Write previous changes to disk and continue?" Select "Go Back" - Do not write the changes to disk or you will have to recover.
- Select "Install Now"
- A new pop up will show up with the title "Do you want to return to the partitioning menu?" Select "Continue"
- Another popup: "Do you want to return to the partitioner?" Select "Continue"
- Another popup: "Continue with installation? No partition table changes ..." Select "Continue"
Once all of that completes and you reboot (pressing Ctrl-L when the splash screen shows), you should be in a full independent Linux on your laptop. This allows you to alter any of the etc files, create custom kernels etc. I'll get into those steps later.
Saturday, March 14, 2015
Cheaper Music Making - Part 5 - interlude with Sunvox

So far I've gone through setting up a Linux chroot on a Chromebook, setting up KxStudio and downloading hundreds of audio plugins and programs all in one go. Since then, I've been working on Linux with various DAWs, figuring out various ways to configure Jack audio and MIDI and a huge amount of trial an error. Music on Linux is still far from easy!
So while I wrestle with all of the applications, ask questions on linuxmusicians and learn, here is a quick tip on making music on Linux with no fuss whatsoever! If you've used Sunvox on any platform (and indeed it runs on most of them), you know what you're in for - a tracker interface, a self-contained studio with sampled instruments, modular synthesis and some very good effects.
It has a steep learning curve of its own, but it runs on almost anything. If you have a refrigerator with a Linux based controller, it might just run Sunvox! Without installing KxStudio, Jack or anything else, you can install the Linux 64 bit binary onto your Linux chroot and immediately get sound with Sunvox.
The downside is that I did not see a current Sunvox installable via the typical Ubuntu repositories, so you have to download the multi-platform binary file here. You should copy the file to your home directory with your favorite file manager.
Double-clicking the zip file will decompress it and if you do that in your home directory, you should end up with a set of folders under sunvox. The one that matters for the Chromebooks is the linux_x86_64 folder.

Extra credit - if you want to create an icon and put it in your applications menu, you'll have to create a desktop file and go through some more steps. If you're interested, drop me a line and I can document that process as well.
Now, back to wrestling with Ardour and other DAWs!
Monday, March 9, 2015
Cheaper Music Making - Part 4 You don't know Jack

In the first parts of this series, we covered how to get Linux installed on a Chromebook and how to get the KxStudio repository configured and merged into your installation. Part 3 covered installing some of the meta-packages which by default, give you a huge number of multimedia processors, plugins and tools.
The great thing about Linux is that most tools are open source and free to use. No torrenting, pirating or anything else the least bit illegal required. One downside, perhaps is that there are tons of similar packages all doing more or less the same thing and it can be difficult to get them all sorted out.
In the part, I'll help you get a few key packages installed and configured so that you will have a reasonably capable DAW configured and ready for use with your preferred MIDI controller. In my case I will set up a QuNexus keyboard to use with our Linux studio.
To start with, we are going to once again put in a little command that will add your userid to the hwaudio group in Linux - without going into too much detail, this will cause your audio tools to run with a much higher priority and will, in theory, keep latency low! Make sure you have started up your Linux desktop as described in the prior posts. Open up the Terminal emulator from the panel and type the following command:
sudo adduser (youruserid) hwaudio
sudo adduser mike hwaudio
In order to make the various music applications and plugins on Linux see and talk to one another, we are going to need to use a utility that is similar to InterApp Audio on iPads or the Environment window on some DAWs such as Logic. This utility will manage the routing of audio and MIDI events between applications and is called Jack (as in the kind you plug in).
Like most tools in Linux, Jack has a command line interface that can be used but we are going to use one of many GUI options for controlling Jack. I have found that the easiest one to use is QJackCtl which is available in your Applications Menu (upper left) in the Multimedia|Hardware Configuration section.
Running that should show you this GUI screen:

Here we are going to press the Setup button and configure Jack for the Chromebook.

We are going to set the Interface to "cras" and the Frames/Period to "512". The Frames/Period controls the latency and 512 is a conservative value that seems to work well providing roughly 23.2 msec latency. You can experiment with smaller or larger values once you get things running.
Press OK to accept the values and then press the Start button on the Jack screen. You should see something like:

If this lights up without errors, you are in business. If there are errors, you can press the Messages button to troubleshoot. In the next part, we will set up our DAW to use the Jack connections and we will hook up a MIDI keyboard to the Chromebook. I did say at one point that this is not for the faint of heart!
Monday, March 2, 2015
Cheaper Music Making - part 3 KxStudio

The Linux environment we have so far is pretty generic. We have a basic GUI and not a whole lot else so far. Since we are using Chrome OS as our base kernel, we have a few constraints on what we do Linux-wise. There are a few Linux distributions that are geared towards music making including Unbuntu-Studio and KxStudio to mention two of them.
For our installation, we are going to use KxStudio, but we are not going to install a full Linux since we already are running Chrome OS. What we are going to do is to add the KxStudio repository to our installation and then add only the pieces of KxStudio that we need to make music.
The first step to add KxStudio applications to our already installed environment is to add the repository into our Linux chroot. For that we need to:
- Press Ctrl-Alt-T to open our Crosh shell
- Type shell and press enter
- Type sudo startxfce4 -n kxstudio to go into our linux environment
- Click on the Terminal icon in our Linux environment to open a shell window
- Type sudo add-apt-repository ppa:kxstudio-team/kxstudio (you'll be prompted to enter your password)
- Type sudo apt-get update to refresh the packages available
- Now type sudo apt-get install kxstudio-repos
- and one more time sudo apt-get update
- and last to update any packages that kxstudio has newer versions of, we will run sudo apt-get dist-upgrade
After doing all of this, the package manager in our Linux installation will now have access to the tons of music programs availabe via kxstudio as well as its original installation. Package managers in Linux are there to work out dependencies so that when you install something, all the pieces needed for it to work will be installed as well and if there is a conflict, the package manager should tell you.
To make our lives easier moving forward, let's install a graphical package installation tool instead of always using "apt-get" from the command line.
- In our terminal window, type sudo apt-get install synaptic to install the package management tool.
- Once this is done, you should see in your applications menu (upper left of laptop), under the System menu, an option for Synaptic package manager. Clicking this will prompt you for your password and will display a graphical window that we can use to install future programs into our environment.

Now we have an easier way to filter and install our software. I suggest pressing the "Search Results" button and type "kxstudio-meta" into the quick filter box. This will show several "meta packages" which contain groups of applications that can be installed all at once.
I started by clicking the box next to kxstudio-desktop. This will install tons of software and drivers for the kxstudio environment including an office suite and a fair amount of productivity software. I like having these, but technically you might not need these for just music. In any event, selecting this and pressing apply installed some 800+ files onto the environment - it takes awhile!
The next selections you will need include:
kxstudio-meta-audio
kxstudio-meta-audio-plugins
Make note of the others, you may want to install more of the codecs (MP3 for example) and some of the other files. Please avoid anything related to the linux kernel since we are sharing the Chrome OS kernel in our environment. Once you go through installing these options, your Applications menu will have a huge multimedia set of programs for music creation. Next comes the fun task of configuring this mess to actually make noise!
Friday, February 27, 2015
Cheaper Music Making - part 2 - OS

Chrome OS itself is a variant of Linux but very scaled down to just the essentials. If you are looking for just cloud-based software such as google Docs or online Microsoft Word, Excel, etc. you won't need any of this. In fact there is a pretty cool online Audio making site called Audiotool (thanks to Rok Kovač for the information) that looks pretty cool and requires no hacking at all. Of course it is limited to the instruments it includes, but still looks fun.
To run a full localized DAW and music software, however, we have to install a more robust operating system with its own file storage and software repository. Since we are going for "free", we are going open source with Linux on the chromebook. The chromebook is already optimized in many ways for Linux and it is an easy fit.
For Linux on a chromebook, there are 2 popular options. One option is to replace the bios, create a dual-boot solution and create a completely independent environment. The other option is to use the Chrome OS kernel but install a "chroot" environment to provide a separate disk image. There is an open source project called chrubuntu that addresses the first option, but I am going with the second option which is supported by a utility called crouton.
Crouton allows us to create a new OS as a chroot but still keep the Chrome OS kernel. This means that we can switch back and forth between the two environments and all of the hardware resources will be fully supported. In the case of chrubuntu, it is up to you to get the drivers needed for your particular hardware. For purely music making purposes, chrubuntu might be a more stable solution once you have sorted out all the hardware issues, but for ease of installation and maintenance, I much prefer the crouton solution. As with my iPad, I don't use my chromebook "just for music". I also do software development on it with python/django so the ability to hot key back and forth is really a plus for me.
Installing crouton is fairly straight-forward - the link I provided has good instructions. However, there are many installation possibilities. I recommend installing the default ubuntu release (and older 12.04) along with the light XFCE desktop environment.
To do this, you first have to download crouton here. This will put a script into your Downloads folder on the chrome box. I suggest that you install your Linux chroot as follows:
- Press Ctrl-Alt-T to get a terminal window
- Type shell and press enter
- Type sudo sh -e ~/Downloads/crouton -t chrome,keyboard,xfce -n kxstudio
This will download a lot of files, take around 15-30 minutes and will eventually prompt you to create a logon name and password. Once you do that, you have a full Linux installation! Note - I recommend not installing the xiwi target which lets your linux run in a chrome tab. While this is nice, it does not allow for hardware video acceleration and will cause problems with music apps.
To enter this new installation, you will type sudo startxfce4 to start your graphical linux environment. This will put you into an X-Windows based Linux environment! Get acquainted, google xfce, play around. To switch back and forth between Linux and Chrome OS, type ctrl-alt-shift and right or left arrow. This will toggle back and forth.
To close your Linux shell, select logout from the menu and it will drop you back into chrome. Whenever you want to get back into Linux, type Ctrl-Alt-T, type shell and then type sudo startxfce4.
Just one more thing (sorry Steve).... There is a minor fix you need to make in the startxfce4 script in order to enable midi and the sound device in your new Linux chroot. Let's do that now.
Just one more thing (sorry Steve).... There is a minor fix you need to make in the startxfce4 script in order to enable midi and the sound device in your new Linux chroot. Let's do that now.
- Press Ctrl-Alt-T to get the terminal window
- Type shell and press enter
- type cd /usr/local/bin and press enter
- type sudo vi startxfce4 (welcome to the horror that is vi!!!)
- Navigate in the editor down to the blank line just above the line reading "exec sh....." using either the arrow keys (wimp!) or the much cooler j,k,l and ; keys.
- On the blank line, press i (this puts you in insert mode in this retro editor)
- Type the following lines:
# set up audio device
sudo modprobe snd-seq-midi
sudo chmod 777 /dev/snd/seq
Now press the esc key to exit insert mode.
Press the ":" key followed by wq and then press enter.
Congratulations! You are a unix wizard. Now the next time you start up your Linux chroot, the sound device will be enabled, you should be able to plug in MIDI keyboards and hopefully things will work!
This might be a good time to take a backup of your new Linux environment. If you did not do the bios trick to lock developer mode OR you find it necessary to "power wash" (its a thing) your chrome book to fix a chrome issue, you will lose your data. If you have a backup, you can easily recover it.
To backup your chroot using crouton, do the following:
- Type Ctrl-Alt-T and type shell and enter
- Type sudo edit-chroot -b kxstudio
- This will run for a few minutes and will create a file in your Downloads folder named with your Linux chroot and a timestamp. Once this completes, copy this file off to a usb stick in case you wipe your computer's storage.
Please refer to the crouton site here for instructions on how to recover from a backup if you need to.
Thursday, February 26, 2015
Cheaper Music Making - Part 1, Hardware
As I indicated in my last post, I am experimenting with using a commodity chromebook as a music studio laptop and will document my findings as we go. My goal in this is to have a very cheap (under $300 total) music studio laptop to incorporate into my iMac, iPad music making flow. As I often state in this blog, I'm an amateur music maker and don't mind experimenting for experimentation's sake at times!
This is not for the faint of heart and if command lines scare you, don't try any of this! Ideally, you should have some idea of Linux but I'll try to spell things out where possible.
For this effort, I am going to use a commercial chromebook as a starting point. One thing to note about chromebooks is that they have 2 basic CPU types - Intel and ARM based. Both work reasonably well for just the Chrome OS, but for hacking purposes and what will be necessary to make music, I STRONGLY recommend sticking with an Intel based chromebook.

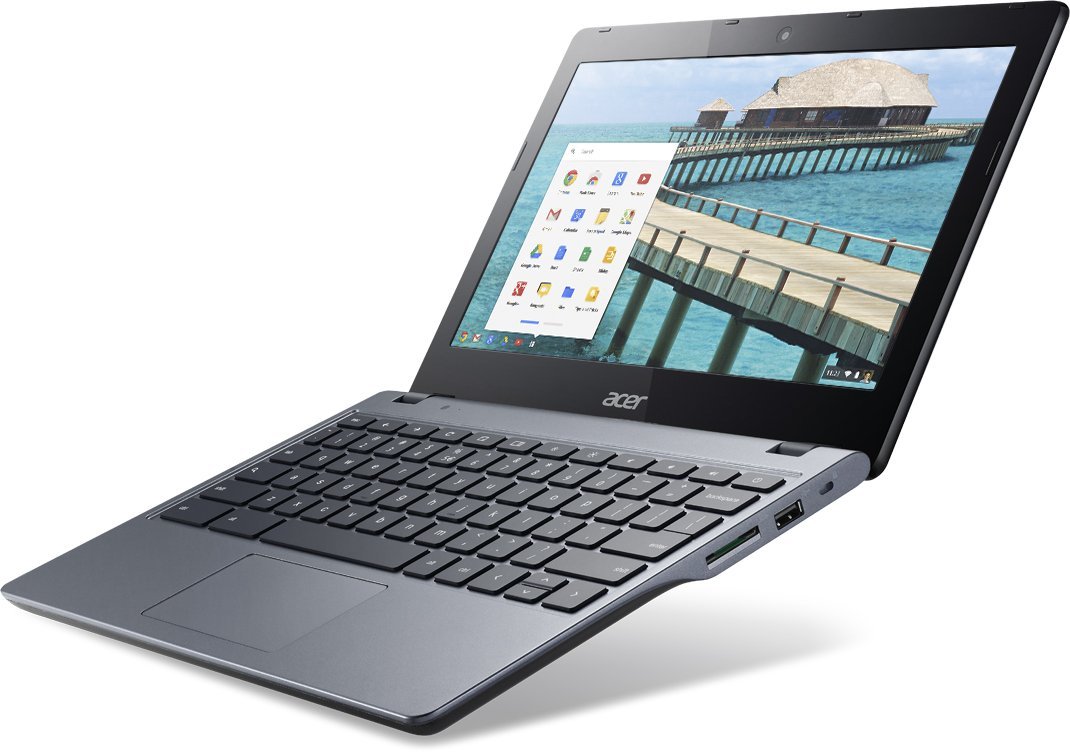
There are tons of choices here. I will be working with the classic Acer C720 chromebook for its somewhat faster CPU, easy hackability and well-documented solutions to some of the challenges in running Linux side by side with Chrome OS. The model I used has a list price around $200 (or less) at the time of this writing and I will recommend a minor hardware upgrade costing an additional $55. Some of the hardware "tweaks" I recommend here are particular to the Acer model. If you use something else, do some research on how to apply the same upgrades.
For $200, the Acer C720 gives you a basic 11" laptop running a 64-bit dual core Celeron Haswell processor, 16 GB of SSD storage and 2GB (soldered! yuck) of memory. Pretty basic hardware which is more than fast enough for the normal demands of the Chrome OS, but presents a few challenges for music making. I prefer the small size for portability, but there are bigger chromebooks if screensize matters more to you.
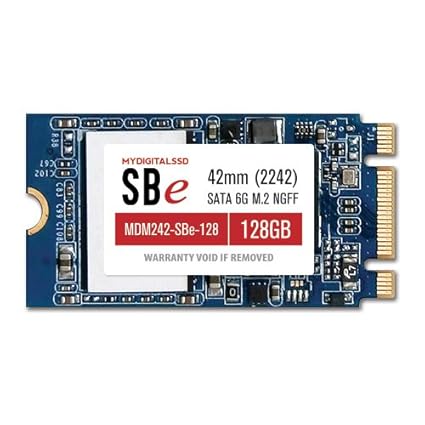
First off, the storage! 16GB is plenty for the Chrome OS where you save almost everything into the cloud. Google gives you either 100GB or 1 terabyte of storage free for 2 years with your purchase. For music making, however, you need more local storage and I suggest that you do an upgrade yourself to 128GB. It is not essential, you can fit probably one Linux distro on the 16GB, but storage will get tight.

A bigger concern is the 2GB of memory. This is fine for Chrome OS but a bit small for some Linux programs. There are some 4GB chromebooks out there and if you can find one, might be a good ideas up front! In my case, these were too scarce so I settled for the 2GB which is unfortunately soldered to the motherboard so you won't be upgrading it. There is an easy fix to make that memory go much further in both Chrome and in our music environment (which if you haven't guessed yet, will be Linux based). I have found the processor to be the least of my worries on the chromebook and with the SSD, the chromebook "feels" faster than even my desktop iMac in most respects.
In order to "hack on" our Linux based music studio, we are going to have to put the chromebook into its "developer mode" which, thankfully, is pretty easy to do. On the chromebook, press at the same time esc, refresh (the key 2 keys to the right of esc) and the power button on the far right. This will reboot the chromebook into recovery mode. When the recovery message comes up, press ctrl-D. This will put you into developer mode which is essential for using Linux on the chromebook.
Whenever you reboot the chromebook or update your Chrome OS by restarting it, a pop up screen will show with a 30 second timer and a message stating "Chrome OS verification is turned off" and a prompt to press the spacebar. Under no circumstances do you want to do this unless you want to start over! This will reset the chromebook and wipe out any non-chrome software that you have installed. Instead, when this message is displayed, you need to press Ctrl-D again to stay in Developer mode. You've been warned!
Since we are this far and in developer mode, let's take care of the 2GB limit on memory. Linux will let you create "swap partitions" that will swap memory onto disk and back again when more memory is needed than you have. In the case of the chromebook, you don't have a magnetic disk but you have a SSD. It is normally a very bad idea to use a SSD drive as swap space. The SSD would be constantly reading/writing to the same locations which would wear it out faster. The good news is that the Chrome OS uses a technique called "ZRam" on Linux. We can allocate swap space, and Chrome will "compress" the memory in place and use actual memory for the swap space, not the SSD. This can effectively double your memory.
To activate swap, all we have to do is press Ctrl + Alt + T which opens a shell called "Crosh".

We can type "swap enable", optionally with a number of MB (I suggest 2048 for 2 GB) and press enter. Swap should fit in main memory and you'll have much better performance both in Chrome OS and in our Linux installation when we get there.
At this point, we have a running chrome OS in developer mode with better memory management. Before we install any software, however, let's think about upgrading the SSD and let's fix that problem with having to press Ctrl-D or risk losing our software when someone presses the spacebar by mistake! The next steps (optional, not required) will:
This is not for the faint of heart and if command lines scare you, don't try any of this! Ideally, you should have some idea of Linux but I'll try to spell things out where possible.
For this effort, I am going to use a commercial chromebook as a starting point. One thing to note about chromebooks is that they have 2 basic CPU types - Intel and ARM based. Both work reasonably well for just the Chrome OS, but for hacking purposes and what will be necessary to make music, I STRONGLY recommend sticking with an Intel based chromebook.
There are tons of choices here. I will be working with the classic Acer C720 chromebook for its somewhat faster CPU, easy hackability and well-documented solutions to some of the challenges in running Linux side by side with Chrome OS. The model I used has a list price around $200 (or less) at the time of this writing and I will recommend a minor hardware upgrade costing an additional $55. Some of the hardware "tweaks" I recommend here are particular to the Acer model. If you use something else, do some research on how to apply the same upgrades.
For $200, the Acer C720 gives you a basic 11" laptop running a 64-bit dual core Celeron Haswell processor, 16 GB of SSD storage and 2GB (soldered! yuck) of memory. Pretty basic hardware which is more than fast enough for the normal demands of the Chrome OS, but presents a few challenges for music making. I prefer the small size for portability, but there are bigger chromebooks if screensize matters more to you.
First off, the storage! 16GB is plenty for the Chrome OS where you save almost everything into the cloud. Google gives you either 100GB or 1 terabyte of storage free for 2 years with your purchase. For music making, however, you need more local storage and I suggest that you do an upgrade yourself to 128GB. It is not essential, you can fit probably one Linux distro on the 16GB, but storage will get tight.
A bigger concern is the 2GB of memory. This is fine for Chrome OS but a bit small for some Linux programs. There are some 4GB chromebooks out there and if you can find one, might be a good ideas up front! In my case, these were too scarce so I settled for the 2GB which is unfortunately soldered to the motherboard so you won't be upgrading it. There is an easy fix to make that memory go much further in both Chrome and in our music environment (which if you haven't guessed yet, will be Linux based). I have found the processor to be the least of my worries on the chromebook and with the SSD, the chromebook "feels" faster than even my desktop iMac in most respects.
In order to "hack on" our Linux based music studio, we are going to have to put the chromebook into its "developer mode" which, thankfully, is pretty easy to do. On the chromebook, press at the same time esc, refresh (the key 2 keys to the right of esc) and the power button on the far right. This will reboot the chromebook into recovery mode. When the recovery message comes up, press ctrl-D. This will put you into developer mode which is essential for using Linux on the chromebook.
Whenever you reboot the chromebook or update your Chrome OS by restarting it, a pop up screen will show with a 30 second timer and a message stating "Chrome OS verification is turned off" and a prompt to press the spacebar. Under no circumstances do you want to do this unless you want to start over! This will reset the chromebook and wipe out any non-chrome software that you have installed. Instead, when this message is displayed, you need to press Ctrl-D again to stay in Developer mode. You've been warned!
Since we are this far and in developer mode, let's take care of the 2GB limit on memory. Linux will let you create "swap partitions" that will swap memory onto disk and back again when more memory is needed than you have. In the case of the chromebook, you don't have a magnetic disk but you have a SSD. It is normally a very bad idea to use a SSD drive as swap space. The SSD would be constantly reading/writing to the same locations which would wear it out faster. The good news is that the Chrome OS uses a technique called "ZRam" on Linux. We can allocate swap space, and Chrome will "compress" the memory in place and use actual memory for the swap space, not the SSD. This can effectively double your memory.
To activate swap, all we have to do is press Ctrl + Alt + T which opens a shell called "Crosh".
We can type "swap enable", optionally with a number of MB (I suggest 2048 for 2 GB) and press enter. Swap should fit in main memory and you'll have much better performance both in Chrome OS and in our Linux installation when we get there.
At this point, we have a running chrome OS in developer mode with better memory management. Before we install any software, however, let's think about upgrading the SSD and let's fix that problem with having to press Ctrl-D or risk losing our software when someone presses the spacebar by mistake! The next steps (optional, not required) will:
- Involve some minor hardware surgery on the chromebook
- voids your warranty :) We don't need no stinking warranties!
Before we do surgery, we should make sure that you create a recovery USB drive to allow us to recover the Chrome OS to the new SSD we want to install. Follow the instructions here to create the USB stick.
Now we are ready to open up the laptop and do our surgery. This site shows how to open up the laptop and gives instructions on removing the bios write protect screw. We will use that as a guideline, but follow the instructions here since our setup will be slightly different.
Once you get the laptop opened, remove the screw as indicated in the pictures. We will then turn the laptop back over, plug it in (with the back still off) and we will set the bios so that developer mode will be "locked" and the reboot screen will only show for 2 seconds.
To do that, once the screw is removed:
- Press Ctrl-Alt-T to get a shell prompt.
- Type shell and press enter
- Type sudo su and press enter (puts you on as root)
- Type cd /usr/bin and press enter
- Type set_gbb_flags.sh 0x9 and press enter
We are not using the setting shown in the site because we won't be dual-booting. Use the "0x9" value instead. Now you can replace the write protect screw but leave the back open, we are going to replace the SDD drive while we are here.
I mentioned above that a bigger SDD is a good idea and I recommend this one. It is essential that you pick this type of socket to be compatible with the C720 hardware. Take out the screw on the existing SDD (again refer to the picture), gently remove it and replace it with the new SDD. I found that the label on the one I bought was on the other side than the original! Once installed, replace the screw and you are set to put the back back on and screws back in.
When you next reboot, you'll get an error of course because we have a blank SDD. You will be prompted to put in your recovery USB which you should do. A few minutes later, you should have a new recovered chromebook with 128GB of storage. You log onto google once more, it will recover ALL of your settings from Chrome OS and you are back in business with better hardware!
Next post, we will install our operating system for our music studio.
Subscribe to:
Posts (Atom)