Friday, February 27, 2015

Cheaper Music Making - part 2 - OS

In the last post, I wrote up all the hardware steps needed to prepare your chromebook to be a music studio. In this post, I want to pick up and continue with setting up the operating system (Linux) that we will use to host our music software on the chromebook.

Chrome OS itself is a variant of Linux but very scaled down to just the essentials. If you are looking for just cloud-based software such as google Docs or online Microsoft Word, Excel, etc. you won't need any of this. In fact there is a pretty cool online Audio making site called Audiotool (thanks to Rok Kovač for the information) that looks pretty cool and requires no hacking at all. Of course it is limited to the instruments it includes, but still looks fun.

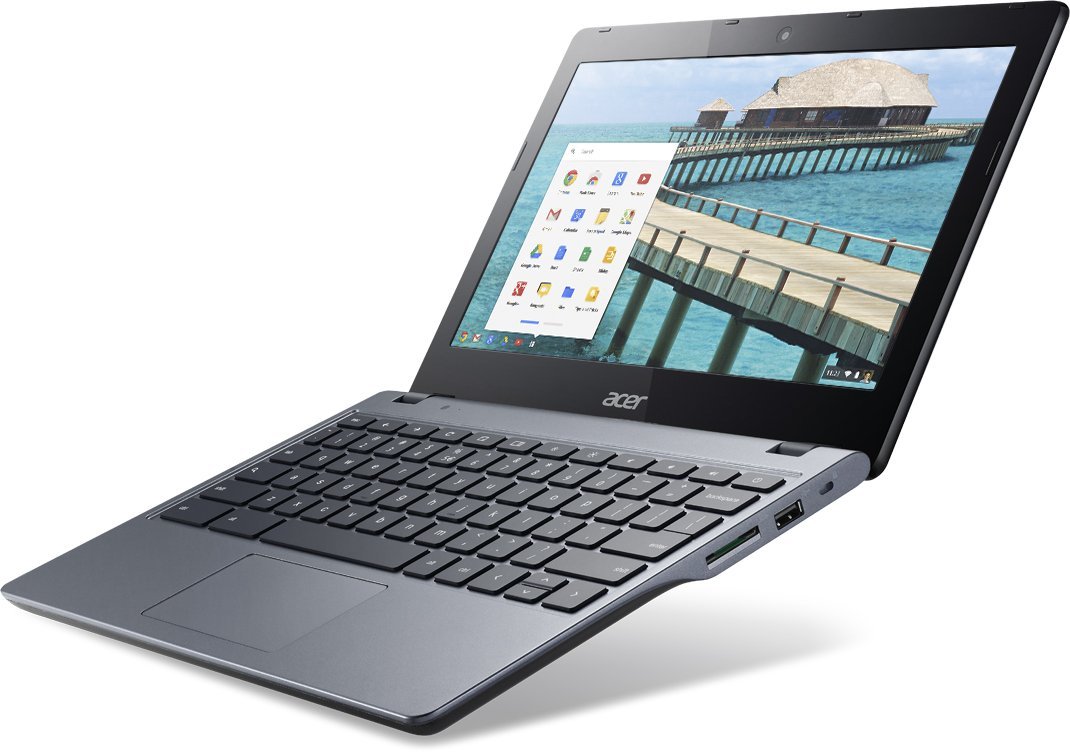
To run a full localized DAW and music software, however, we have to install a more robust operating system with its own file storage and software repository. Since we are going for "free", we are going open source with Linux on the chromebook. The chromebook is already optimized in many ways for Linux and it is an easy fit.

For Linux on a chromebook, there are 2 popular options. One option is to replace the bios, create a dual-boot solution and create a completely independent environment. The other option is to use the Chrome OS kernel but install a "chroot" environment to provide a separate disk image. There is an open source project called chrubuntu that addresses the first option, but I am going with the second option which is supported by a utility called crouton.

Crouton allows us to create a new OS as a chroot but still keep the Chrome OS kernel. This means that we can switch back and forth between the two environments and all of the hardware resources will be fully supported. In the case of chrubuntu, it is up to you to get the drivers needed for your particular hardware. For purely music making purposes, chrubuntu might be a more stable solution once you have sorted out all the hardware issues, but for ease of installation and maintenance, I much prefer the crouton solution. As with my iPad, I don't use my chromebook "just for music". I also do software development on it with python/django so the ability to hot key back and forth is really a plus for me.

Installing crouton is fairly straight-forward - the link I provided has good instructions. However, there are many installation possibilities. I recommend installing the default ubuntu release (and older 12.04) along with the light XFCE desktop environment.

To do this, you first have to download crouton here. This will put a script into your Downloads folder on the chrome box. I suggest that you install your Linux chroot as follows:

  1. Press Ctrl-Alt-T to get a terminal window
  2. Type shell and press enter
  3. Type sudo sh -e ~/Downloads/crouton -t chrome,keyboard,xfce -n kxstudio
This will download a lot of files, take around 15-30 minutes and will eventually prompt you to create a logon name and password. Once you do that, you have a full Linux installation! Note - I recommend not installing the xiwi target which lets your linux run in a chrome tab. While this is nice, it does not allow for hardware video acceleration and will cause problems with music apps. 

To enter this new installation, you will type sudo startxfce4 to start your graphical linux environment. This will put you into an X-Windows based Linux environment! Get acquainted, google xfce, play around. To switch back and forth between Linux and Chrome OS, type ctrl-alt-shift and right or left arrow. This will toggle back and forth. 

To close your Linux shell, select logout from the menu and it will drop you back into chrome. Whenever you want to get back into Linux, type Ctrl-Alt-T, type shell and then type sudo startxfce4.

Just one more thing (sorry Steve).... There is a minor fix you need to make in the startxfce4 script in order to enable midi and the sound device in your new Linux chroot. Let's do that now.


  1. Press Ctrl-Alt-T to get the terminal window
  2. Type shell and press enter
  3. type cd /usr/local/bin and press enter
  4. type sudo vi startxfce4 (welcome to the horror that is vi!!!)
  5. Navigate in the editor down to the blank line just above the line reading "exec sh....." using either the arrow keys (wimp!) or the much cooler j,k,l and ; keys.
  6. On the blank line, press i (this puts you in insert mode in this retro editor)
  7. Type the following lines:
# set up audio device
sudo modprobe snd-seq-midi
sudo chmod 777 /dev/snd/seq

Now press the esc key to exit insert mode.
Press the ":" key followed by wq and then press enter.

Congratulations! You are a unix wizard. Now the next time you start up your Linux chroot, the sound device will be enabled, you should be able to plug in MIDI keyboards and hopefully things will work!

This might be a good time to take a backup of your new Linux environment. If you did not do the bios trick to lock developer mode OR you find it necessary to "power wash" (its a thing) your chrome book to fix a chrome issue, you will lose your data. If you have a backup, you can easily recover it.

To backup your chroot using crouton, do the following:

  1. Type Ctrl-Alt-T and type shell and enter
  2. Type sudo edit-chroot -b kxstudio
  3. This will run for a few minutes and will create a file in your Downloads folder named with your Linux chroot and a timestamp. Once this completes, copy this file off to a usb stick in case you wipe your computer's storage.

Please refer to the crouton site here for instructions on how to recover from a backup if you need to.


Thursday, February 26, 2015

Cheaper Music Making - Part 1, Hardware

As I indicated in my last post, I am experimenting with using a commodity chromebook as a music studio laptop and will document my findings as we go. My goal in this is to have a very cheap (under $300 total) music studio laptop to incorporate into my iMac, iPad music making flow. As I often state in this blog, I'm an amateur music maker and don't mind experimenting for experimentation's sake at times!

This is not for the faint of heart and if command lines scare you, don't try any of this! Ideally, you should have some idea of Linux but I'll try to spell things out where possible.

For this effort, I am going to use a commercial chromebook as a starting point. One thing to note about chromebooks is that they have 2 basic CPU types - Intel and ARM based. Both work reasonably well for just the Chrome OS, but for hacking purposes and what will be necessary to make music, I STRONGLY recommend sticking with an Intel based chromebook.


There are tons of choices here. I will be working with the classic Acer C720 chromebook for its somewhat faster CPU, easy hackability and well-documented solutions to some of the challenges in running Linux side by side with Chrome OS. The model I used has a list price around $200 (or less) at the time of this writing and I will recommend a minor hardware upgrade costing an additional $55. Some of the hardware "tweaks" I recommend here are particular to the Acer model. If you use something else, do some research on how to apply the same upgrades.

For $200, the Acer C720 gives you a basic 11" laptop running a 64-bit dual core Celeron Haswell processor, 16 GB of SSD storage and 2GB (soldered! yuck) of memory. Pretty basic hardware which is more than fast enough for the normal demands of the Chrome OS, but presents a few challenges for music making. I prefer the small size for portability, but there are bigger chromebooks if screensize matters more to you.

First off, the storage! 16GB is plenty for the Chrome OS where you save almost everything into the cloud. Google gives you either 100GB or 1 terabyte of storage free for 2 years with your purchase. For music making, however, you need more local storage and I suggest that you do an upgrade yourself to 128GB. It is not essential, you can fit probably one Linux distro on the 16GB, but storage will get tight.


A bigger concern is the 2GB of memory. This is fine for Chrome OS but a bit small for some Linux programs. There are some 4GB chromebooks out there and if you can find one, might be a good ideas up front! In my case, these were too scarce so I settled for the 2GB which is unfortunately soldered to the motherboard so you won't be upgrading it. There is an easy fix to make that memory go much further in both Chrome and in our music environment (which if you haven't guessed yet, will be Linux based). I have found the processor to be the least of my worries on the chromebook and with the SSD, the chromebook "feels" faster than even my desktop iMac in most respects.

In order to "hack on" our Linux based music studio, we are going to have to put the chromebook into its "developer mode" which, thankfully, is pretty easy to do. On the chromebook, press at the same time esc, refresh (the key 2 keys to the right of esc) and the power button on the far right. This will reboot the chromebook into recovery mode. When the recovery message comes up, press ctrl-D. This will put you into developer mode which is essential for using Linux on the chromebook.

Whenever you reboot the chromebook or update your Chrome OS by restarting it, a pop up screen will show with a 30 second timer and a message stating "Chrome OS verification is turned off" and a prompt to press the spacebar. Under no circumstances do you want to do this unless you want to start over! This will reset the chromebook and wipe out any non-chrome software that you have installed. Instead, when this message is displayed, you need to press Ctrl-D again to stay in Developer mode. You've been warned!

Since we are this far and in developer mode, let's take care of the 2GB limit on memory. Linux will let you create "swap partitions" that will swap memory onto disk and back again when more memory is needed than you have. In the case of the chromebook, you don't have a magnetic disk but you have a SSD. It is normally a very bad idea to use a SSD drive as swap space. The SSD would be constantly reading/writing to the same locations which would wear it out faster. The good news is that the Chrome OS uses a technique called "ZRam" on Linux. We can allocate swap space, and Chrome will "compress" the memory in place and use actual memory for the swap space, not the SSD. This can effectively double  your memory.

To activate swap, all we have to do is press Ctrl + Alt + T which opens a shell called "Crosh".

We can type "swap enable", optionally with a number of MB (I suggest 2048 for 2 GB) and press enter. Swap should fit in main memory and you'll have much better performance both in Chrome OS and in our Linux installation when we get there.

At this point, we have a running chrome OS in developer mode with better memory management. Before we install any software, however, let's think about upgrading the SSD and let's fix that problem with having to press Ctrl-D or risk losing our software when someone presses the spacebar by mistake! The next steps (optional, not required) will:

  1. Involve some minor hardware surgery on the chromebook
  2. voids your warranty :) We don't need no stinking warranties! 
Before we do surgery, we should make sure that you create a recovery USB drive to allow us to recover the Chrome OS to the new SSD we want to install. Follow the instructions here to create the USB stick.

Now we are ready to open up the laptop and do our surgery. This site shows how to open up the laptop and gives instructions on removing the bios write protect screw. We will use that as a guideline, but follow the instructions here since our setup will be slightly different.

Once you get the laptop opened, remove the screw as indicated in the pictures. We will then turn the laptop back over, plug it in (with the back still off) and we will set the bios so that developer mode will be "locked" and the reboot screen will only show for 2 seconds.

To do that, once the screw is removed:
  1. Press Ctrl-Alt-T to get a shell prompt.
  2. Type shell and press enter
  3. Type sudo su and press enter (puts you on as root)
  4. Type cd /usr/bin and press enter
  5. Type set_gbb_flags.sh 0x9 and press enter
We are not using the setting shown in the site because we won't be dual-booting. Use the "0x9" value instead. Now you can replace the write protect screw but leave the back open, we are going to replace the SDD drive while we are here.

I mentioned above that a bigger SDD is a good idea and I recommend this one. It is essential that you pick this type of socket to be compatible with the C720 hardware. Take out the screw on the existing SDD (again refer to the picture), gently remove it and replace it with the new SDD. I found that the label on the one I bought was on the other side than the original! Once installed, replace the screw and you are set to put the back back on and screws back in.

When you next reboot, you'll get an error of course because we have a blank SDD. You will be prompted to put in your recovery USB which you should do. A few minutes later, you should have a new recovered chromebook with 128GB of storage. You log onto google once more, it will recover ALL of your settings from Chrome OS and you are back in business with better hardware!

Next post, we will install our operating system for our music studio.


Wednesday, February 25, 2015

Cheaper music making?

I've been fairly active in my music making hobbies since 2004 primarily on my iMac or iPad. On the iMac, I started with Garageband and eventually moved on to Logic Express 9 and now Logic Pro X. Somewhere during that time, the iPad happened and I also have roughly a hundred music making apps of one kind and another on the tablet.

Anyone knowing me has seen me go through an endless stream of gadgets during my life from early PCs to handheld devices, Linux servers, netbooks etc. I'm a techie and proud of it :). I've had cheap laptops, netbooks and more recently have become enamored with chromebooks.

Cheap is the operative word in most cases excepting my Apple devices. Another thing about me is that over time, I have soured almost completely on Windows. I have to use a Windows PC professionally (though its mostly Oracle and Java stuff) and that is more than enough. As a techie, I've been the de-facto family "consultant" for cleaning, de-virusing and configuring countless PCs and it sickens me how much care and feeding Windows machines require. Yeah, if you know what you're doing, you should be fine. But my elderly aunts, in-laws and neighbors invariably have the machine slowed down to a crawl within a year. Windows is NOT consumer friendly.

Until recently, I recommended the "cheapest" Apple options to relatives - the Mac Mini or a MacBook of one kind or another. The up front few hundred dollars is worth it for the long term pain savings - and overall that is still true. Thankfully, though, there are now far cheaper alternatives that are even easier to maintain - Google Chromebooks and Chromeboxes.

If you've checked them out, you know that they are easy, fast and work well for basic internet type activities and light office work provided you are mostly connected to the internet at all times. For great aunts and moms, its a no-brainer. The only catch so far is no Skype, but Google Hangouts works just as well and at about $200 a pop, you can drop and mangle 5 of these suckers for the price of ONE Macbook Air. Even if you need the full computer for something, as a second computer, these are almost at the disposable price point.

In my personal case, I wanted to take a $200 chrome book and use it as a software development laptop and now as a music laptop. That's a bit crazy! But as I'll show, not terribly hard to pull off if you're patient (and cheap, like me).

So I hope to blog a bit about the process of converting a cheap laptop into a portable music studio and find out if its even worth doing! A short spoiler - I do have things running fairly well at this point so things look promising. I haven't stress tested anything and the open source DAWs do take some getting used to. Stay tuned!

Saturday, February 7, 2015

MIDI Madness on an iPad


As I post often, my music is mostly created with MIDI tracks from either soft synths, MIDI controllers or sequenced MIDI patterns. MIDI makes it easy for me to correct any errors or mistakes. MIDI lets me swap in and out different samples, synths or instruments without having to rerecord anything. Its the best thing going in modern music in my opinion!

On the desktop, I use Logic X and normally create many MIDI tracks that I eventually bounce down into finished songs (or long sequences of annoying noise depending on your point of view). On the iPad as I write often, I want the same easy experience I have on Logic X with MIDI and sadly, that is not yet possible.

Many DAWs on the iPad support MIDI and some also support Virtual MIDI to control other apps running at the same time but none of them do so as seamlessly as VSTs or AUs on the desktop. The "gold standard" and closest candidate for me is Cubasis.

I've posted a few times about using MIDI with Cubasis with InterApp Audio and Virtual MIDI but to be honest, doing this is very crash-prone and I've been experimenting quite a bit with simplifying the process. I recently found a pretty good workflow for working with MIDI and I'll step through one method that works pretty well for me.

Recently I posted the piece below using Cubasis, Korg Module Synthology piano and Noatikl:


This piece required getting 3 iOS apps to "play nice" together - Cubasis, Noatikl and Korg Module. I decided to minimize my variables by only using InterApp Audio when necessary and only a few sounds. This is a piano piece and I want the left and right hands to sound "real" and produce a credible piano solo. Virtual MIDI by itself is a challenge, so I defer using IAA and bouncing until I get the basic sounds working and then recorded.


The composition tool for me (as is often the case) is Noatikl. Rather than go into its details, I'll describe what I used it to accomplish (see my tutorial if you want to dig deeper into Noatikl).

I loaded up Korg Module with one of the Synthology piano samples. Unfortunately Korg Module does not let you specify what MIDI channels it listens to but it does support Virtual MIDI in Omni mode (meaning that all MIDI being fed will trigger notes). On this piece, I'll use that to my advantage.

With Korg Module loaded (and background audio enabled from its setup menus), I next load Intermorphic's Noatikl which I will use to "program" the music for this piece. I want to define 2 "voices" in Noatikl which will emit MIDI notes and events. One voice will the the "left hand" of the piano, the other will be the "right hand".

At first the main order of business is to create something that sounds good - so I picked a Lydian scale and 7/4 time (to be weird) in Noatikl and programmed a chord pattern derived from a classic 2-5-1 sequence (2nd note of scale, 5th note, a few others, then back to 1st note). By giving Noatikl an octave range and a rhythm pattern to follow, it plays those notes across a few octaves in order. Now for the "magic", I ask Noatikl to generate diatonic chords for those notes using 3rds for some chords and 4th for others. For the chords I program the voice to randomly use between 3 and 5 notes (or "fingers').

For the "right hand" I program a simple pattern of eighth notes in the scale, ask it to "auto harmonize" with the other voice, and ask it to run the patter 50% of the time and then a random sequence of quarter, eighth and half notes also harmonized the other 50% of the time. A bit of tweaking and parameter setting in Noatikl and I have a piece that sound pretty good to me. The velocities are lightly randomized, the chord timings are slightly delayed to give a human feel and voila, the sound is  ready to be recorded (which is the hard part!).

The sound from Noatikl over virtual MIDI into Korg Module is good but not perfect! At times, the maximum polyphony is exceeded and I hear a distinct "plunk" sound. This is probably a short-coming of Korg Module that I've read documented elsewhere where lots of sustaining notes are playing at once (I did tweak Noatikl to use the sustain pedal and release it on each bar). This will have to be corrected after recording.

To record the piece, I want to use Cubasis. This is where things get tricky with Virtual MIDI as to who drives what. Korg Module is already "listening" to all MIDI channels coming out of Noatikl and I don't want Cubasis feeding it as well. So in Cubasis, I create 2 MIDI tracks, and set the instrument to "None". I just want the MIDI notes recorded. For the MIDI source, I select each Noatikl track number and MIDI channel. So track one is listening to MIDI track 1 in Noatikl and track 2 is listening to track 2 in Noatikl. I make sure that both tracks have MIDI output as None - remember, Korg Module is already playing the MIDI from Noatikl - don't want to feed it twice!


So in theory, we hit "record" in Cubasis, start Noatikl playing the tune and away it goes. Bad news though - when Cubasis first gets MIDI notes from Noatikl, it crashes and restarts (ah the wonder of iPads!). So as a work-around, we start Noatikl playing first, open Cubasis (crash/restart), and then press record - it will pick up with what is currently playing.

We let this go to the end of the song, press stop and we should have good MIDI notes in two tracks in Cubasis. If this worked out OK, we are done with Noatikl. To save memory, I close Noatikl, go back to the two tracks in Cubasis and set their output to "Virtual MIDI". Now Cubasis will "drive" Korg Module.

Playing it back at this point sounds good with a few "plunks" here and there. There are two culprits. One I mentioned is the Korg Module polyphony limit and a few others seem to be MIDI generation bugs either in Noatikl or Cubasis. The "bugs" in MIDI sound like "plunks" too and are visible in the MIDI notes as extremely short notes. I find these and either delete them or lengthen them in the Cubasis editor.

The second "plunks" are harder. You have to listen for them, find the measure and delete a few concurrent notes until they sound right. MIDI makes the editing so much easier than working with Audio files!

Now that it all sounds ok, it comes time to "bounce the tracks". I don't use the MIDI/Inter App Audio in Cubasis since I need to record two tracks at once and IAA only allows one instance of an instrument at a time. The easier way is to create an IAA Audio track in Cubasis, set it to listen to Korg Module, arm it to record, disarm the 2 MIDI channels and play the piece. Cubasis will route the MIDI through Korg Module and record the resulting audio into the Audio track.


Having done this, I then mute the two MIDI tracks and export the track to Soundcloud. If this sounds like more work than a desktop DAW, well, it is! But I've found this workflow to be a bit better than what I've done in past tracks requiring multiple passes. Hope this helps someone!